Table of Contents
How to create a booking with the "Create" buttonHow to create a booking from the Calendar PageThere are 2 ways to manually create a new booking:
- From the "Create" button of the header
- From the Calendar page
How to create a booking with the "Create" button

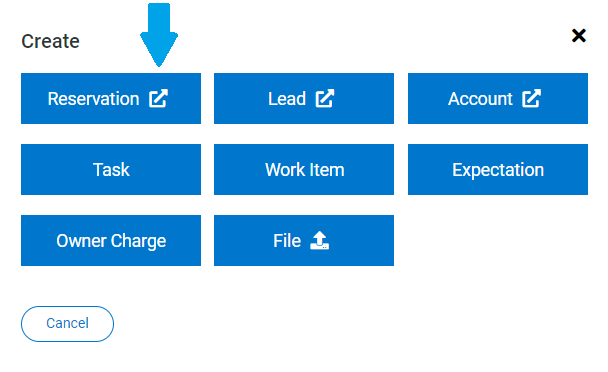
To manually create a booking click on the button "Create" located in the header of the Kigo platform, then click on "Reservation" as shown in the image below:
It opens the "Create Reservation" page with 3 steps:
- Generate Quote
- Create Reservation for an existing user or for a new one
- Billing Details
Generate Quote
Please enter the mandatory information marked with a red asterisk and click on Generate Quote, which will be shown on the right.
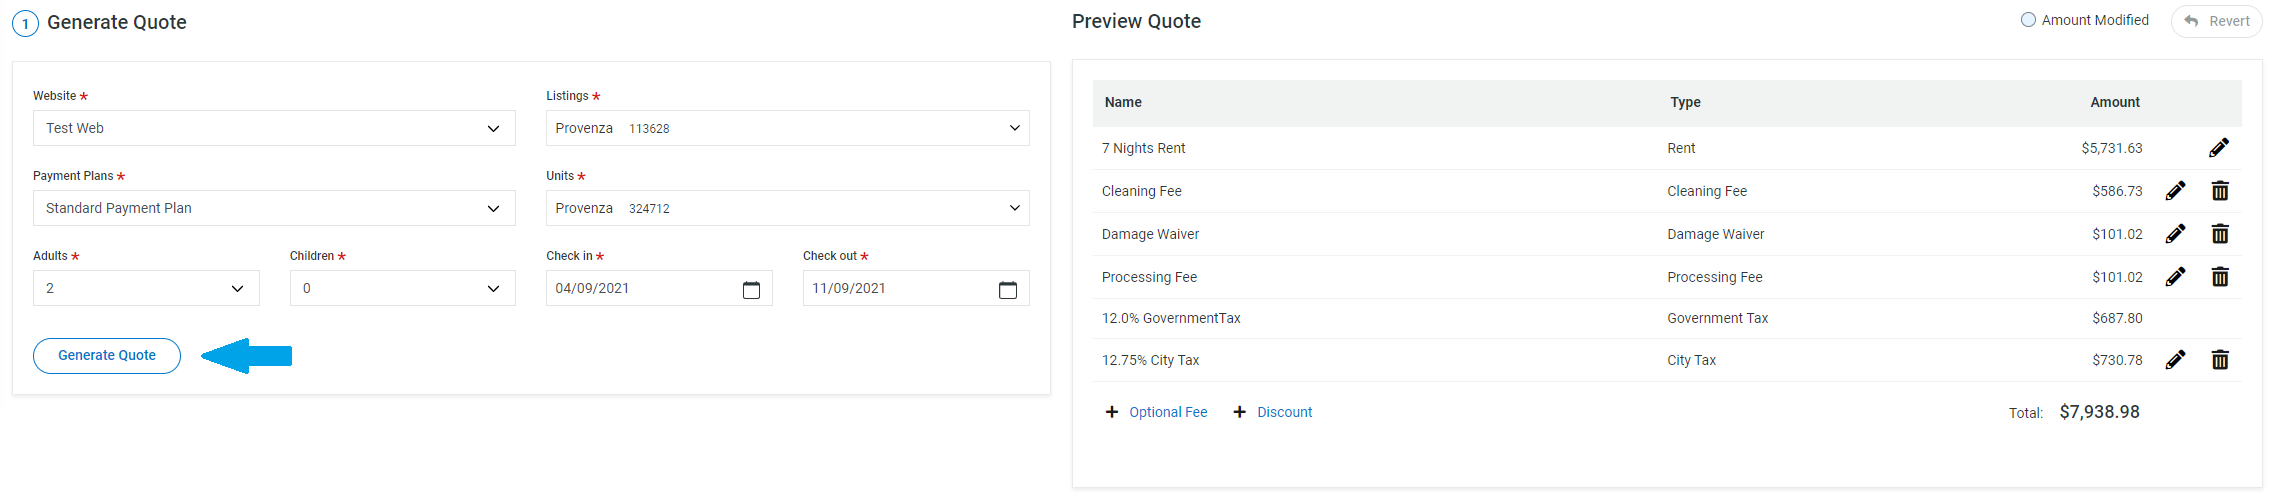
Note: if you have more than one website in Kigo, please select the one that has the rates and configurations you wish to apply to the booking you are creating.
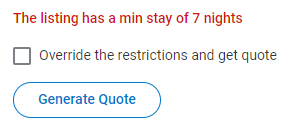
If the dates or the number of guests selected do not respect the listing configurations (such as the minimum stay, maximum capacity etc), the restriction will be shown in red and you have the possibility to override it by clicking on the checkbox "Override the restrictions and get quote":
Modify the quote
Once the quote has been generated, you will be able to modify it to adjust any line item as needed. For example, if you'd like to offer a discount over the phone with a guest that is expressing interest, you can easily do it.
Below you will find the details on how each line item type can be modified:
-
RENT:
You can edit the “price by night” or the “total rent amount”. When the rent is edited, fees and taxes that are set as % over the rent will be recalculated if you haven't manually modified their amounts before.
The rent can't be deleted. It is required to have a rent line item. If you need to offer a rent-free reservation, it can be edited to be 0.
-
FEES:
Fees can be edited, you can edit the total amount of the fee, regardless of the fee rate being originally a percentage or a flat rate. When a fee that is taxable is edited, taxes that were taking into account that fee will be recalculated if upi haven't manually modified them before (*more on which taxes can be modified on the taxes section)
Fees can be deleted.
-
TAXES:
The City Tax can be edited. You can edit the total amount of the city tax, regardless of the city tax rate being originally a percentage or a flat rate.
The City Tax can be deleted.
Other taxes will not be editable nor dispensable.
-
OPTIONAL FEES:
You will be able to add any optional fee that the listing had assigned in the Channel manager > Vacation rental collection.
If there is no optional fee assigned to that listing, or if all optional fees assigned have been attached to the quote, adding an optional fee option will be disabled.
Once added, an optional fee will behave as any other fee (so, it can be modified and it can be deleted).
-
DISCOUNTS:
You will be able to add any coupon code that the listing had previously assigned in the Channel manager > Vacation rental collection. The discount percentage of that coupon can be edited, and, if needed, the coupon can be deleted after being added.
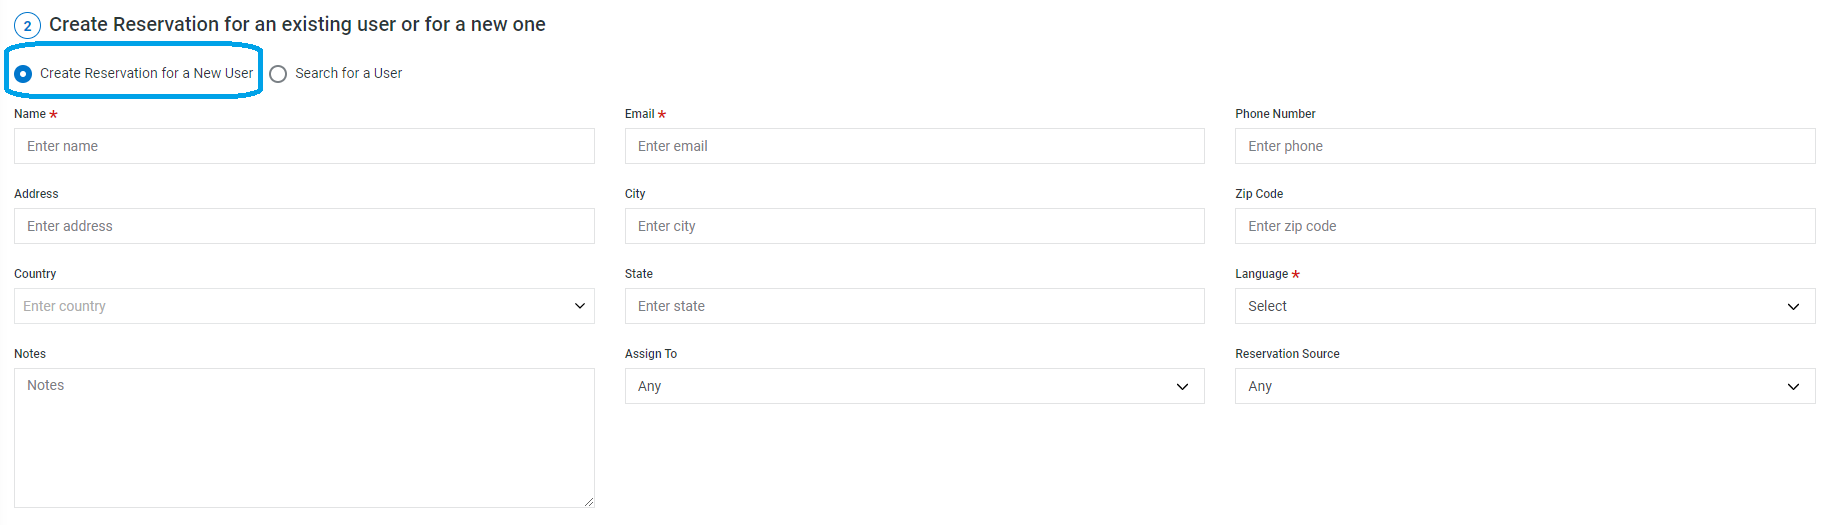
Create Reservation for an existing user or for a new one
If you are creating a reservation for someone that has never booked with you before, leave the option "Create Reservation for a New User" and enter at least Name, Email & Language (marked with a red asterisk):
If you are creating a reservation for a guest that already booked with you before, select "Search for a User" and type the name where indicated below:
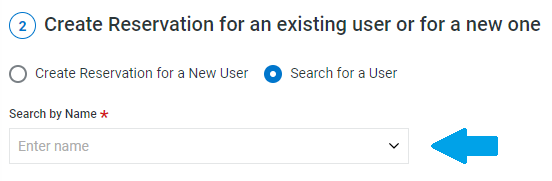
then select the correct user and continue to the third step.
Billing Details

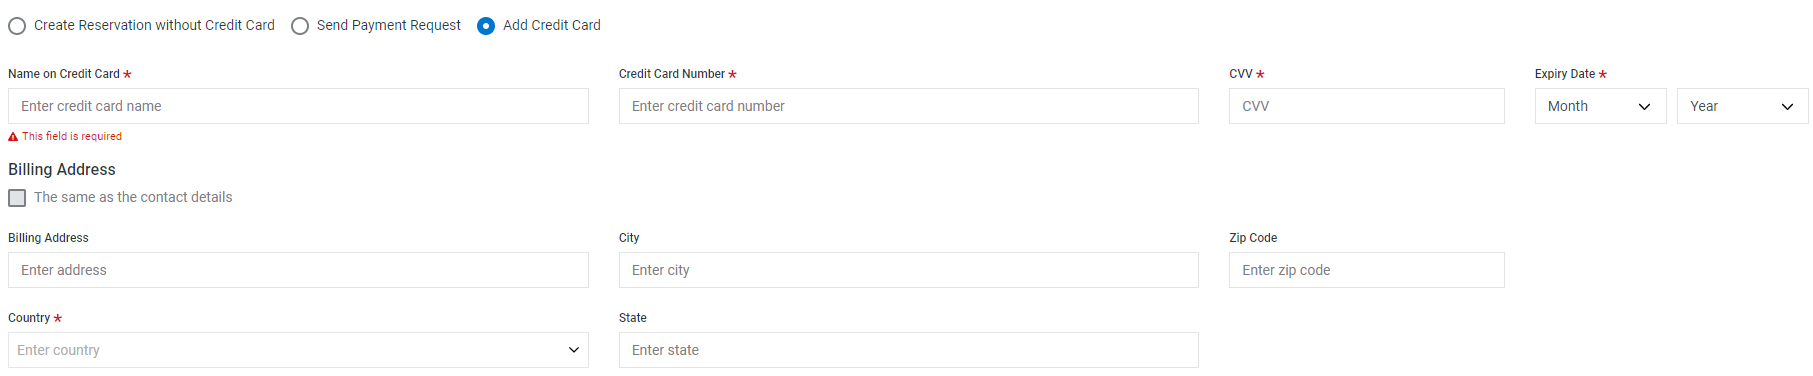
You have 3 options:
- Create Reservation without Credit Card: Once you click on "Create" below, the reservation will be created with the status Held and without any registered payment. Once you register the payment manually, the status will change to Accepted. Once the booking has been created, you can also send the Payment Request message manually.
- Send Payment Request: when selecting this option, you will be able to choose from a dropdown which payment request message you wish to send (if you have more than one created within your custom messages). Once you click on Create below, the booking will be created and the Payment Request message sent automatically. The booking will have the status Held until the guest completes the payment. This option is particularly useful for European clients due to the PSD2 regulations.
-
Add Credit Card: please enter the guest's credit card details and Billing Address. Once you click on the below button "Create" the system will create the booking and try to charge the due amount with the payment gateway integrated in Kigo and assigned to the configuration this listing is using.
Reservation status
You need to select the status:
- Create reservation in Accepted status
- Create reservation in Held status and hold for X amount of time. You can read more on how this status works here.
To create a new booking from the Calendar Page, select the stay dates in the calendar of the desired listing and then click on New Booking as shown in the image below:
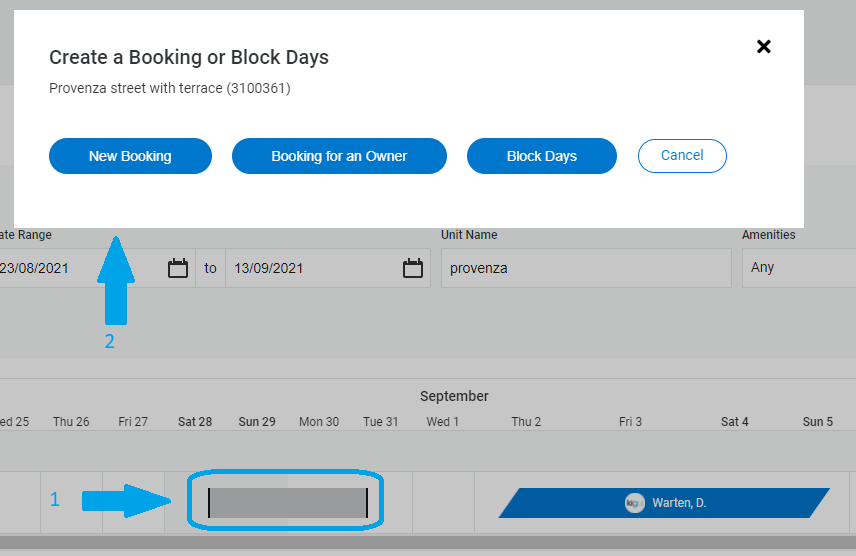
In the Pop-up, select the number of guests (Adults & Children), the Payment Plan and click on "Generate Quote".
You can preview the quote and then click on "Proceed to Booking" to enter the guest details and create the reservation